Install on Windows
Preparing to install
Rapid SCADA requires Internet Information Services (IIS) and .NET Runtime to be installed. Depending on the version of Windows, the installation process for those components may vary.
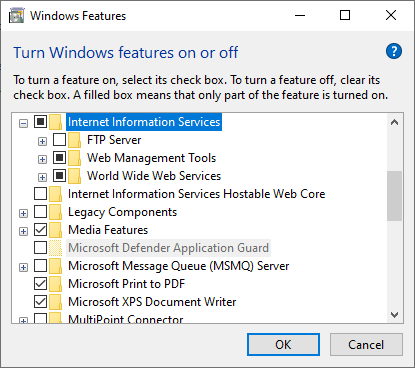
Open Control Panel > Programs > Turn Windows features on or off and enable Internet Information Services. The selection of IIS child components can be kept as default.
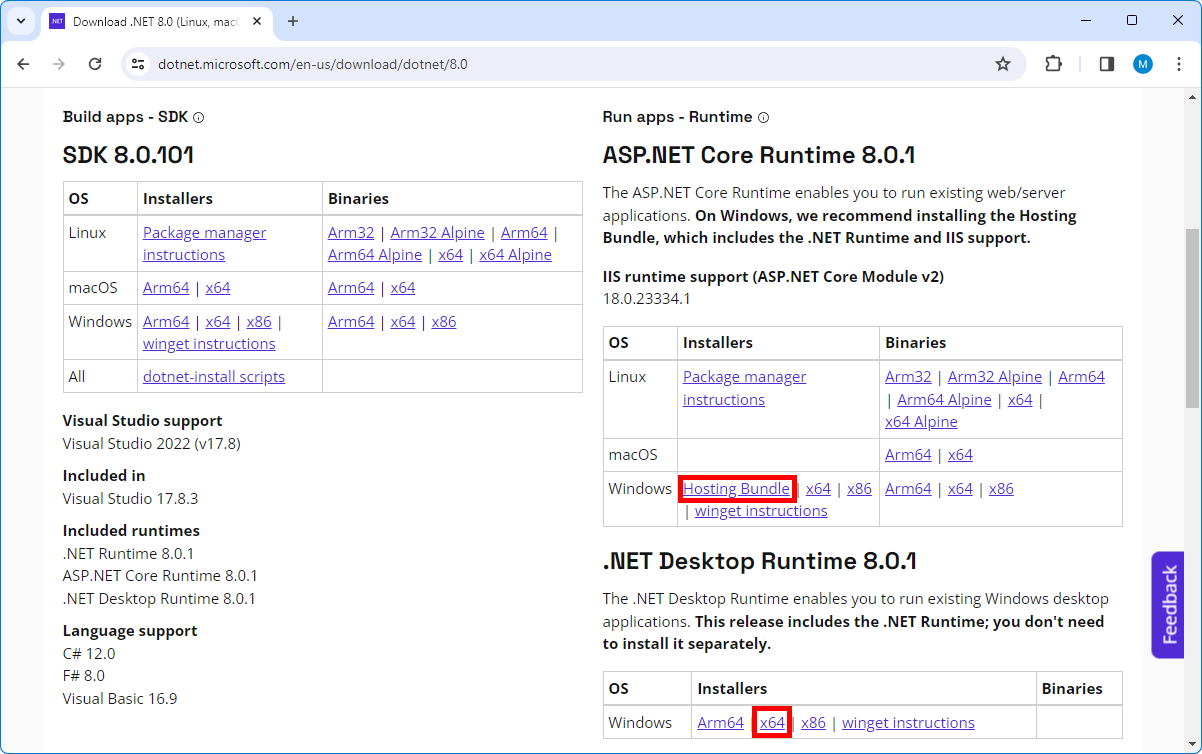
Download from the link and install ASP.NET Core Runtime 8.0.x (Hosting Bundle) and .NET Desktop Runtime.
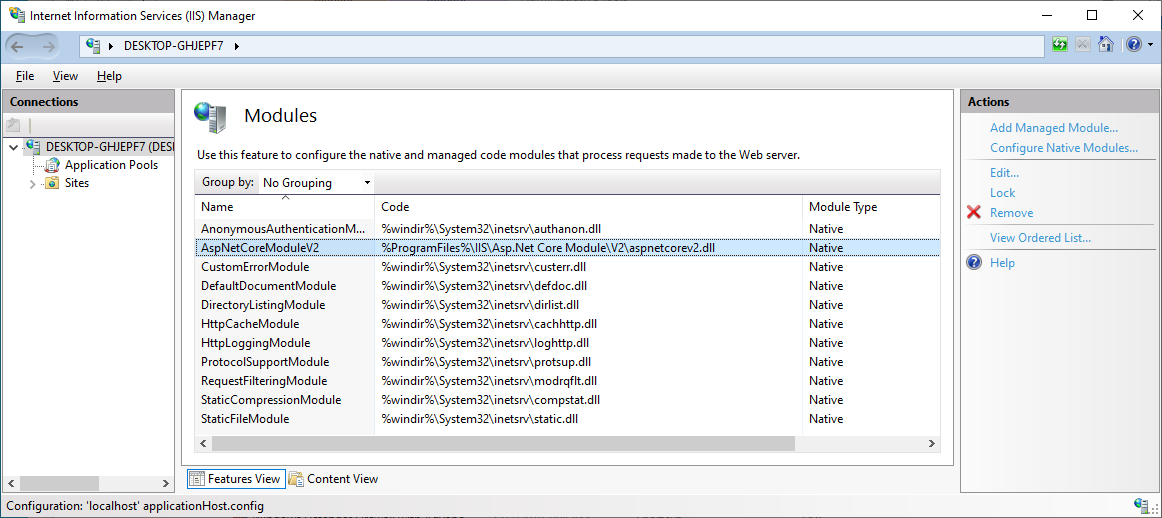
After the installation of the components is complete, open Control Panel > System and Security > Administrative Tools > Internet Information Services (IIS) Manager, navigate to Modules, and make sure that AspNetCoreModuleV2 is installed. If the module is missing, reinstall Hosting Bundle.
Installation
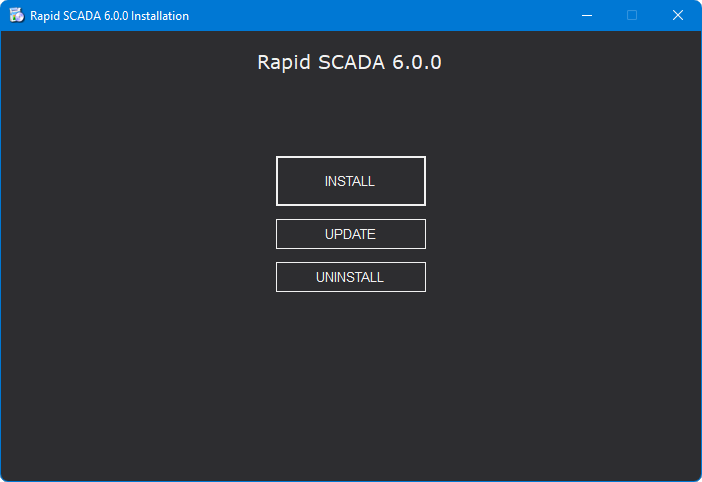
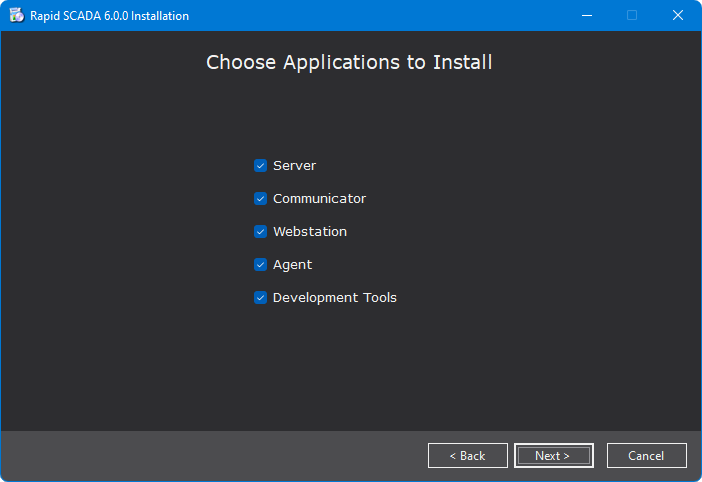
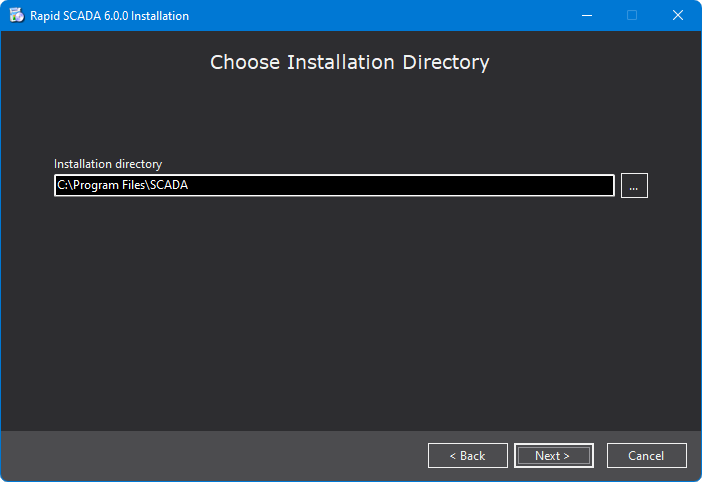
Download and unzip the Rapid SCADA distribution package. Run the ScadaSetup.exe file to open the installer shown in the figures below. Installation must be performed using an administrator account. Click the Install button to enter the installation options.
Note: If the installer does not start, then open the properties of *.dll, *.exe files and unblock the files.
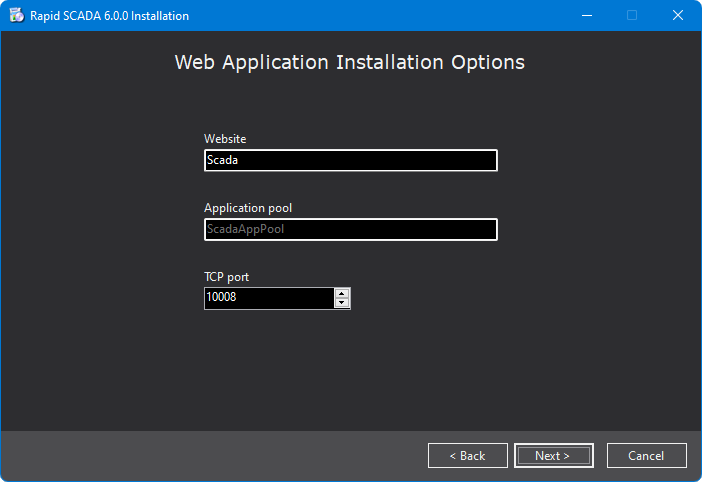
HTTP port 80 is used by the Default Web Site. Therefore, the installer suggests a different port, such as 10008. To use port 80 for Rapid SCADA, the Default Web Site must be stopped.
After the installation has completed successfully, launch a web browser and open http://localhost:10008
Username: admin
Password: scada
The first time the web application starts, it takes time to load the data, so you may need to wait about 10 seconds and then refresh the login page. By default, Rapid SCADA runs the Hello World project. If errors occur during the installation process, analyze them using the installation log. Use the support forum to find a solution.
The Rapid SCADA services actively write to log files. To extend the life of the hard drive and increase system performance, it is recommended to configure logging to RAM drive. Action sequence:
- Install the software for creating RAM drives, for example, AMD Radeon RAMDisk or Dataram RAMDisk.
- Specify the log directory in
ScadaInstanceConfig.xml, for example,R:\SCADA\ - Restart the Rapid SCADA services or reboot the computer.
If the web application is not in use, it stops. On a production server, it is preferable that the web application be always up and running. To ensure this, start Internet Information Services (IIS) Manager, select the ScadaAppPool application pool, open Advanced Settings of the application pool, and set the following options:
- General - Start Mode: AlwaysRunning
- Process Model - Idle Time-out: 0
- Recycling - Regular Time Interval: 0
Update
The installer allows to update the previously installed Rapid SCADA version 6.
Important
- The update feature cannot be used to update Rapid SCADA from version 5 to version 6.
- The update feature does not check the compatibility of the project being executed with the new version of the software.
- The update must first be tested on a test server and only after verification run on a production server.
The update is performed according to the following algorithm:
- Check if the specified installation directory exists.
- Stop the updated services.
- Create a backup copy of the updated applications.
- Update the selected applications. When an application is updated, the existing files are overwritten with the new files. The configuration and storage directories of the application are not affected. Software modules that have been installed additionally remain unchanged.
- Start the services.
Uninstallation
Uninstalling Rapid SCADA is also done using the installer. Therefore, it is recommended not to remove the Rapid SCADA distribution from the hard drive after installation.
Rapid SCADA projects created by users are located by default inside the Documents folder. Therefore, after the removal of Rapid SCADA, the projects will remain. It is strongly not recommended to save projects inside the installation directory, because they may be accidentally deleted by the installer.