Auto Report
Overview
The Auto Report application is designed to automatically generate various reports according to a schedule, save them to disk and send them by email. Download the application using the link. Sending reports by email is provided by the DrvEmail driver, which is included in the Rapid SCADA distribution and does not require separate installation.
The application supports adding new libraries to the list of generated report types. The following report types are supported by default:
- Historical data report.
- Event report.
- Elastic report.
Auto Report works as a service. The application runs tasks to generate reports according to the schedule. Generated reports are saved to disk and, if the corresponding option is enabled, sent by email. Auto Report connects to the Server application to receive commands for generating reports and to send commands for sending reports via email.
Installation
The sequence of installing the Auto Report application on Windows:
- Unzip the application distribution package.
- Copy the contents of the
SCADAdistribution folder to the Rapid SCADA installation directory. - Run the
ScadaAutoReport\svc_install.batfile as administrator to register the service. - Create a shortcut on the desktop to the
ScadaAutoReport\ScadaAutoReportConfig.exefile to launch the Auto Report configurator. -
Launch the configurator and perform the following actions:
- Start the Auto Report service by clicking the
 button.
 - Open the registration form using the
 button and register the application.
- Start the Auto Report service by clicking the
The installation sequence on Linux is as follows:
- Unzip the application distribution package.
- Copy the contents of the
SCADAdistribution folder to the/opt/scada/directory. - Copy the
Daemons/scadareport6.servicefile from the distribution to the/etc/systemd/systemdirectory. -
Enable the service by running the command
sudo systemctl enable scadareport6.service - After the first start of the service, copy the computer code from the log, get the registration key and register the application.
Configuring
The application configuration is saved in the ScadaAutoReportConfig.xml file, which is located in the Config subdirectory of the application. When using Auto Report on Windows, the configuration is performed using the configurator application, which is launched from the ScadaAutoReportConfig.exe file. When running on Linux, the configuration file is edited manually using a text editor.
The screenshots below show the options of the Auto Report application, edited in the configurator application.

Set the Culture option to a non-empty value if the culture used to generate reports should be different from the culture set in the Administrator application for all applications. Specify the Time zone if it is different from the server time zone. Leave both options blank to use the default values.
The CSS path is used when generating reports in HTML format for those report types that support this format. The Report directory is specified if reports should be saved in a directory other than the default report directory. By default, the Reports directory, located one level above the Auto Report application directory, is used to save reports.
If the Pack reports checkbox is checked, the reports are saved to disk as ZIP archives. The Retention option determines how many days to keep reports on disk.
Specify the Channel number to receive commands if reports need to be generated not only according to the schedule, but also upon operator command. The Channel number to send emails is used when sending reports via email to transmit commands to the driver.
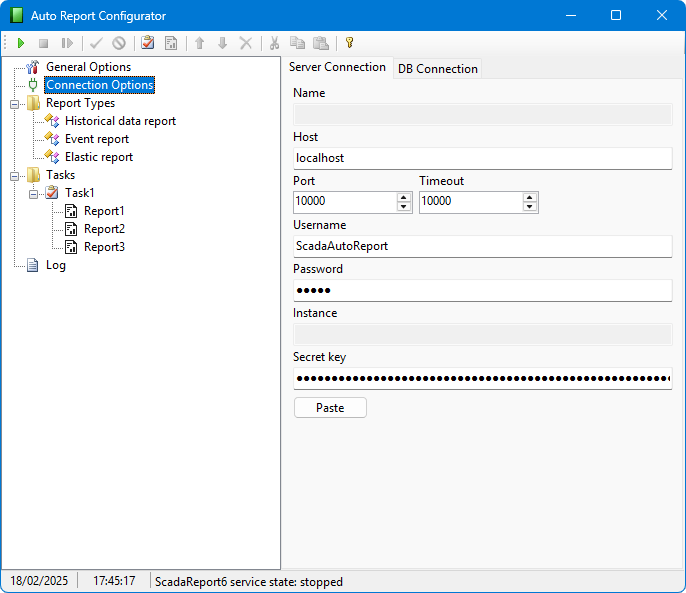
The Server Connection tab contains the options for connecting to the Server application. The specified user must exist in the configuration database. The Secret key should be copied from the Server settings.
The DB Connection tab is used to set parameters for connecting to a database that contains the information needed to generate reports. For the report types available by default, a database connection is not required.
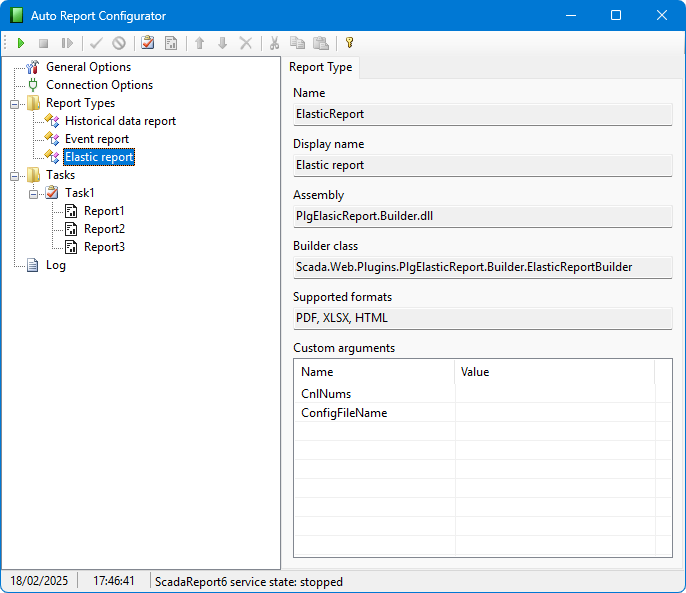
Information about report types in the configurator is available for viewing only. To edit report types through the configuration file, please consult the developers.
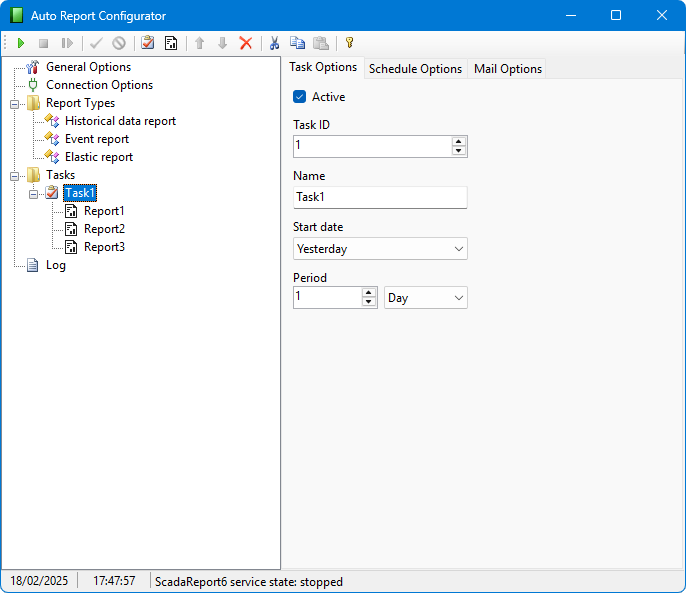
To add a new task, click the  button on the configurator toolbar. The task includes up to several reports and is executed on schedule or on command. The task name is used in the report file name, so it can only contain characters that are allowed in file names. The Start date option defines the beginning of the period of the generated report relative to the current date. The Period option specifies the duration of the report period.
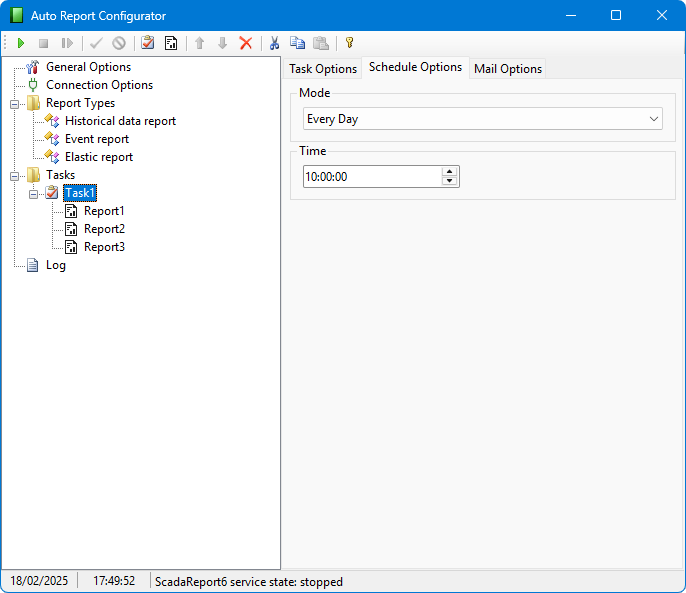
The task for generating a report can be automatically launched Every Day, on certain Days of Week or Days of Month. The Time option specifies the time of day at which the task runs.
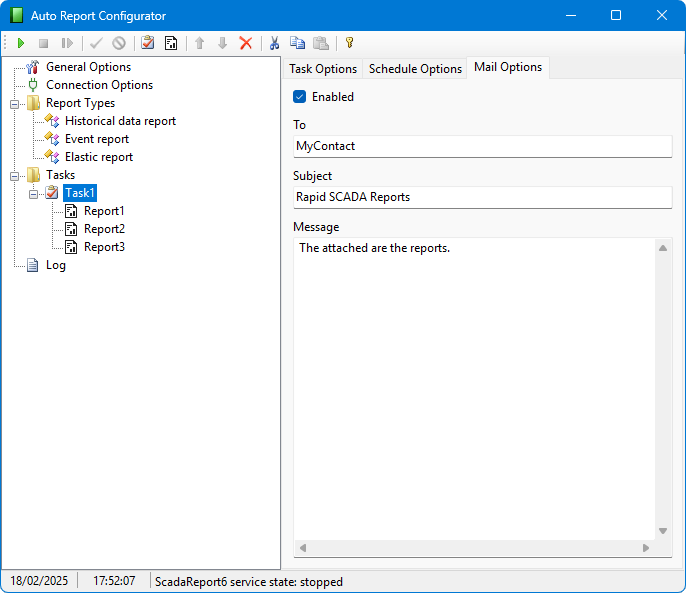
If the Enabled checkbox is checked in the mail options, then the generated reports, in addition to being saved to disk, are also sent by email using the DrvEmail driver. The To field specifies the name of a contact from the driver's address book, the name of a contact group, or an email address.
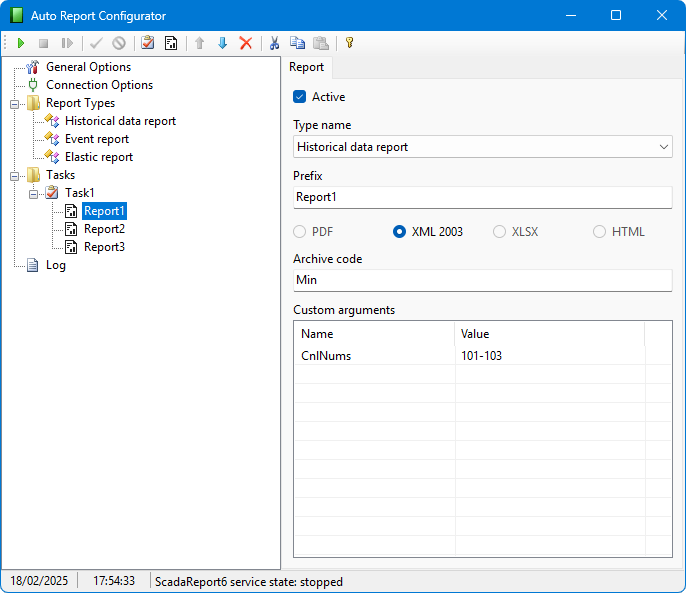
To add a new report to the task, click the  button. Uncheck the Active checkbox to exclude the generation of the report when the task is running. The Prefix is used in the report file name. The formats available for selection (PDF, XML 2003, XLSX, HTML) depend on the report type. Specify the Archive code if the report uses data from the archive that is written by the Server application. The Custom arguments are specific to the selected report type.
To use the Auto Report application, make the following settings in the project using the Administrator application:
- Add a new user, which is specified in the server connection options.
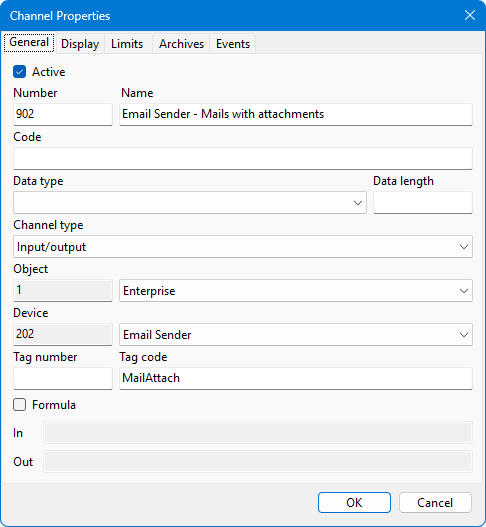
- Create a communication line, device and channels for email operation, if used.
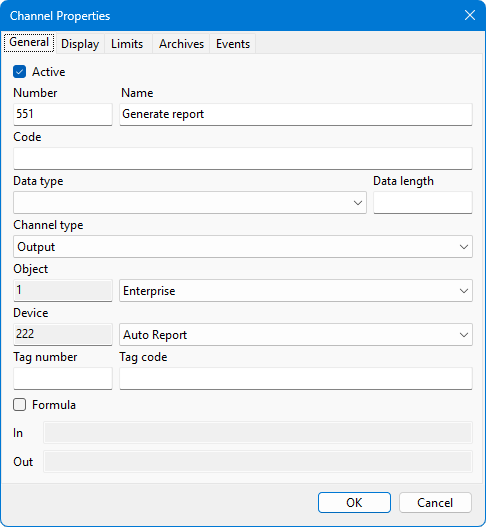
- Create a channel for sending commands to generate reports by an operator, if required.
The figures below show examples of setting up the configuration database of the project.


Operation
On Windows, the Auto Report service is started, restarted, and stopped using the ,  , and
, and  buttons located on the configurator toolbar.
On Linux, to start, restart, and stop the service, use the commands:
sudo systemctl start scadareport6
sudo systemctl restart scadareport6
sudo systemctl stop scadareport6
If the application configuration has changed, restart the Auto Report service for the changes to take effect. Monitor the application's operation using the ScadaAutoReport.log file.
When the service is running, tasks are executed according to the specified schedule. To manually start a task, send a command to the channel specified in the general application options. The command value corresponds to the ID of the task to be launched.